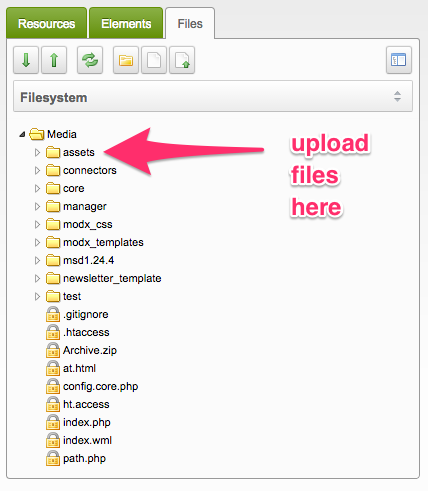
Click the Files tab to reveal a list of your sites files and assets*
Click the folder named Media to expand it's contents
Click the assets folder to it's contents (see below) The Files tab displays a list of folders
Where you upload a file is up to you but it is stongly suggested that any images are uploaded to the images folder and any files are placed within downloads folder.
Select the folder you wish to upload to
Click the Upload Files icon which is usually located on the row of icons below the Resources, Elements and Files tabs
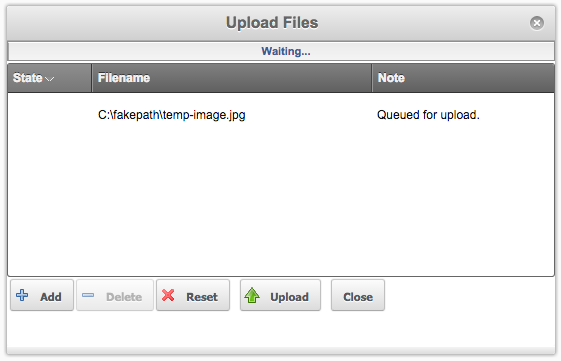
An Upload Files pop-up window should appear
Select the Add button, browse your computer and select your file.
Click the Open button to add the file to the upload queue (see below) The Upload Files pop-up window.
Click the Upload button to begin the upload process
When the Note column reads OK, your file has been uploaded to your chosen folder.
Notes:
Always ensure your filename contains only alpha-numeric charachters and no spaces.
If you wish to separate out words in your file name, please use a minus symbol.
IE myfileforupload.pdf becomes my-file-for-upload.pdf
Some servers have a file upload limit. Please ensure files are a reasonable size. Anywhere up to 5MB is generally acceptable but do consider your web site visitors speed and data allowance.